Can't find what you're looking for?
Start a conversation
Chat conversation only works if you have concented to all cookies. Modify your cookie settings here or send an email to team@twentythree.com
There are settings that apply by default to all your webinars. As an admin , you can access these settings by navigating to the lower-left corner of the Webinar home page and clicking Settings → Webinar Set-up. Below is a detailed description of each setting and how they affect your webinars.
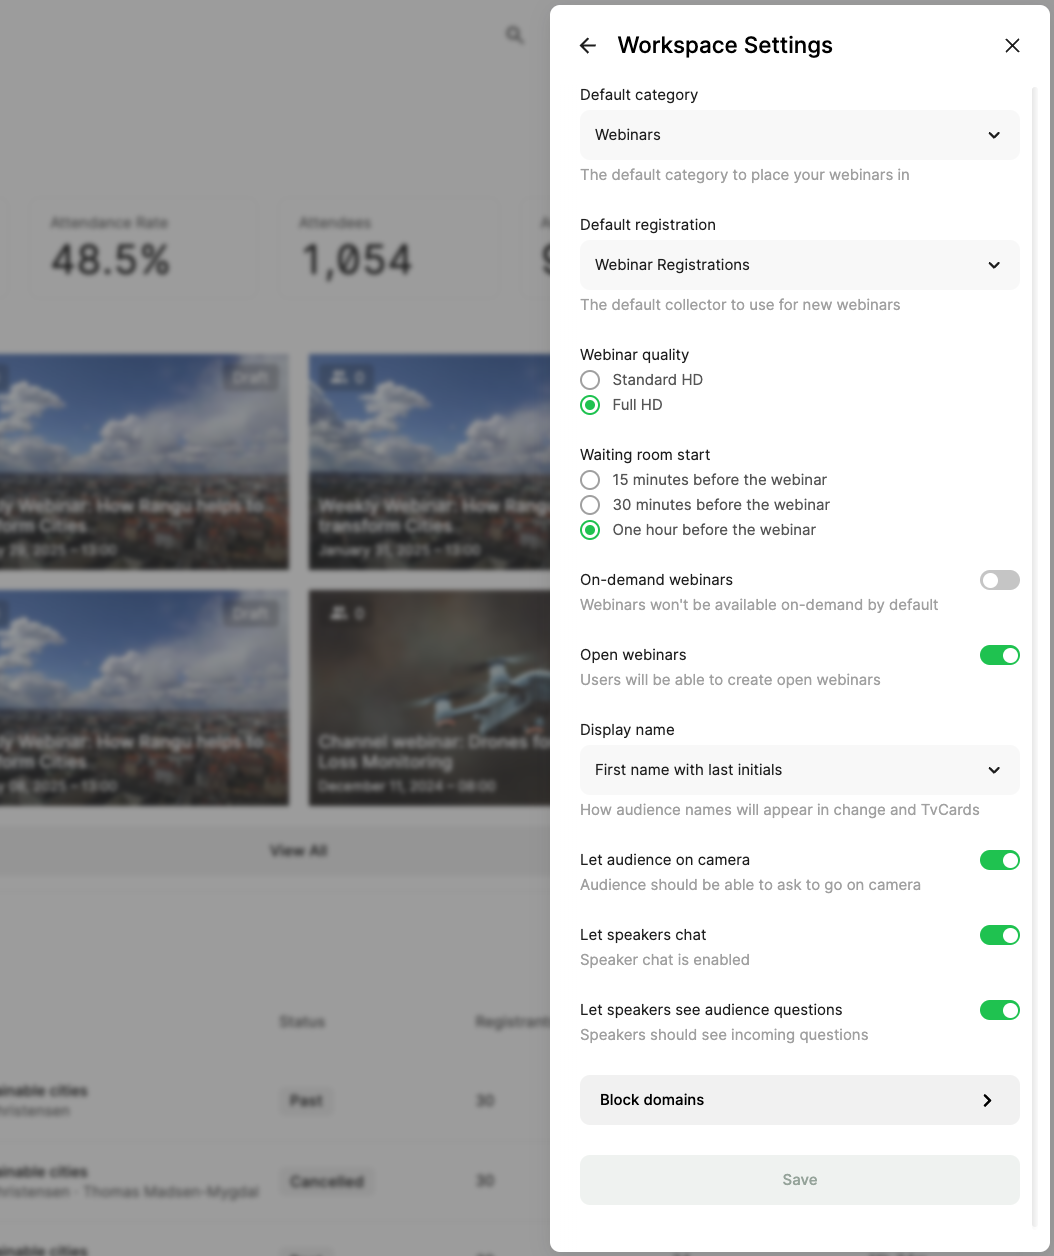
The default category determines where your webinar recordings will be saved by default. This is initially set to the "Webinars" category, but you can choose any other category from the dropdown. You can change this for each webinar individually by editing the webinar description.
The default registration form is the collector that will be used for webinars by default. Initially, this is set to the Webinar Registrations collector, but you can select another form. Ensure that the selected collector is set to Wall typeso it displays correctly on the registration page. As with categories, this can be changed per webinar by editing its description.
By default, webinars stream in HD (720p), ensuring clear visuals for video cameras and screen sharing. You can upgrade to Full HD (1080p) for higher quality, but this requires:
The Waiting Room start time defines when the audience can enter before the webinar begins. The default is 30 minutes before the start time, but you can adjust it to 15 minutes or 1 hour before the scheduled start.
This setting determines whether webinar recordings (on-demand versions) will be available by default after each webinar. This can also be adjusted individually for each webinar in its description.
This setting allows you to control whether other workspace users can designate a webinar as an Open Webinar. More details on Open Webinars are available in this article.
This setting controls how audience names appear in chat and TvCards when they send messages or ask questions. You can choose from:
This setting allows you to decide whether audience members can be brought OnCamera during the webinar. This feature enables speakers and hosts to interact with their audience via video and microphone.
Enabling Speaker Chat provides a private chat for speakers and webinar producers. This can be used for various internal communications during the webinar, such as requesting slide changes or coordinating between speakers and producers. Messages in this chat are visible only to speakers and producers.
You can control whether webinar speakers can see incoming audience questions. Sharing questions can be useful for live Q&A moderation but may have compliance implications. If enabled, speakers can view questions, but only the host can delete or display them on screen.